360 Imagery on the Cheap
- Posted by :Wes Williams
- Date :13 Jul, 2025
- Category : Spatial Tools , Prototypes
360 imagery can be accomplished without a specialized camera using open source software. This example makes use of a smart phone video, ffmpeg, opencv, exiftool, and a-frame.
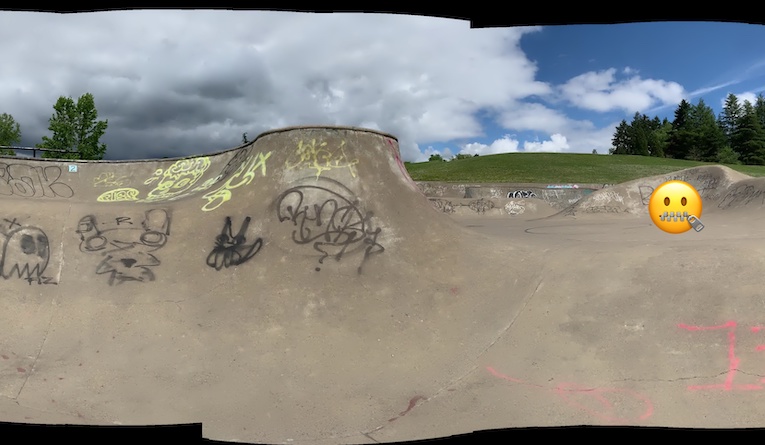
Skatepark imagery for a demo has pros and cons. The skatepark interior is easily isolated from the surrounding environment, and they are often found in public parks. The curved surfaces create interesting occlusion, and graffiti provides unique markers for alignment of images.
The downside is the potentially offensive content in some graffiti. It’s unfortunate such vandalism happens in public areas intended for a mix of ages. The 🤐 emoji is used for censoring offensive content in this example. Apologies if questionable markings were overlooked or misunderstood. In future articles, we might explore detecting and masking graffiti in imagery.
Setup
An ubuntu machine or container with python will need the additional dependencies below.
pip3 install opencv-python-headless
sudo apt install -y ffmpeg
sudo apt install -y exiftool
Image Capture
The objective here is to create a 360 degree panorama. The panorama feature on most cameras don’t go this far. We’ll use a similar photo taking technique as the camera on a mobile phone for this demo. It’s possible to methodically take individual pictures that capture the entire sphere, but we’re going to focus on a quick and easy way to capture at eye level.
Video is a reliable method for capturing the entire area. It ensures coverage from start to finish. The trick is keeping the camera level while rotating at a steady speed from a stationary position. A mount on a pole can be useful here, but similar results are possible with a careful approach. Just start somewhere that you can remember to finish and move at a steady pace.
Extract, Stitch, Buffer & Project
A single script using opencv could accomplish this conversion. In this example, each task is done with a separate tool or script for demonstration purposes. This is just a proof on concept. In future articles, we’ll attempt this processing on a mobile device.
ffmpeg -i images/input.mov -vf fps=3 images/output/output_frame_%04d.jpg
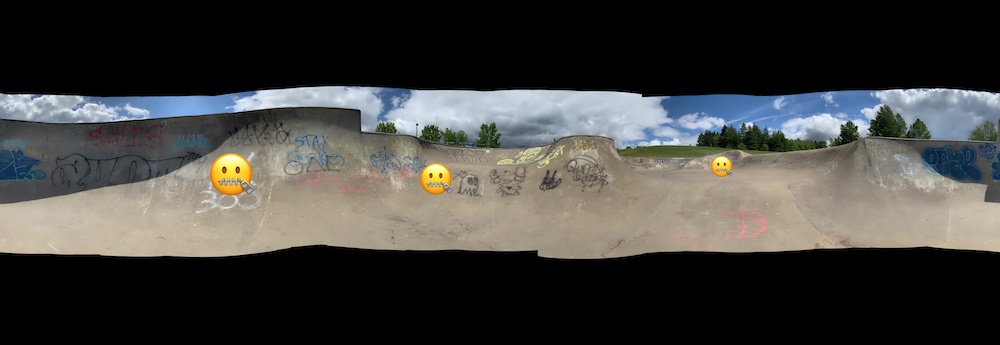
python3 stitching.py images/output/output_frame_0*.jpg --output images/stitched.jpg
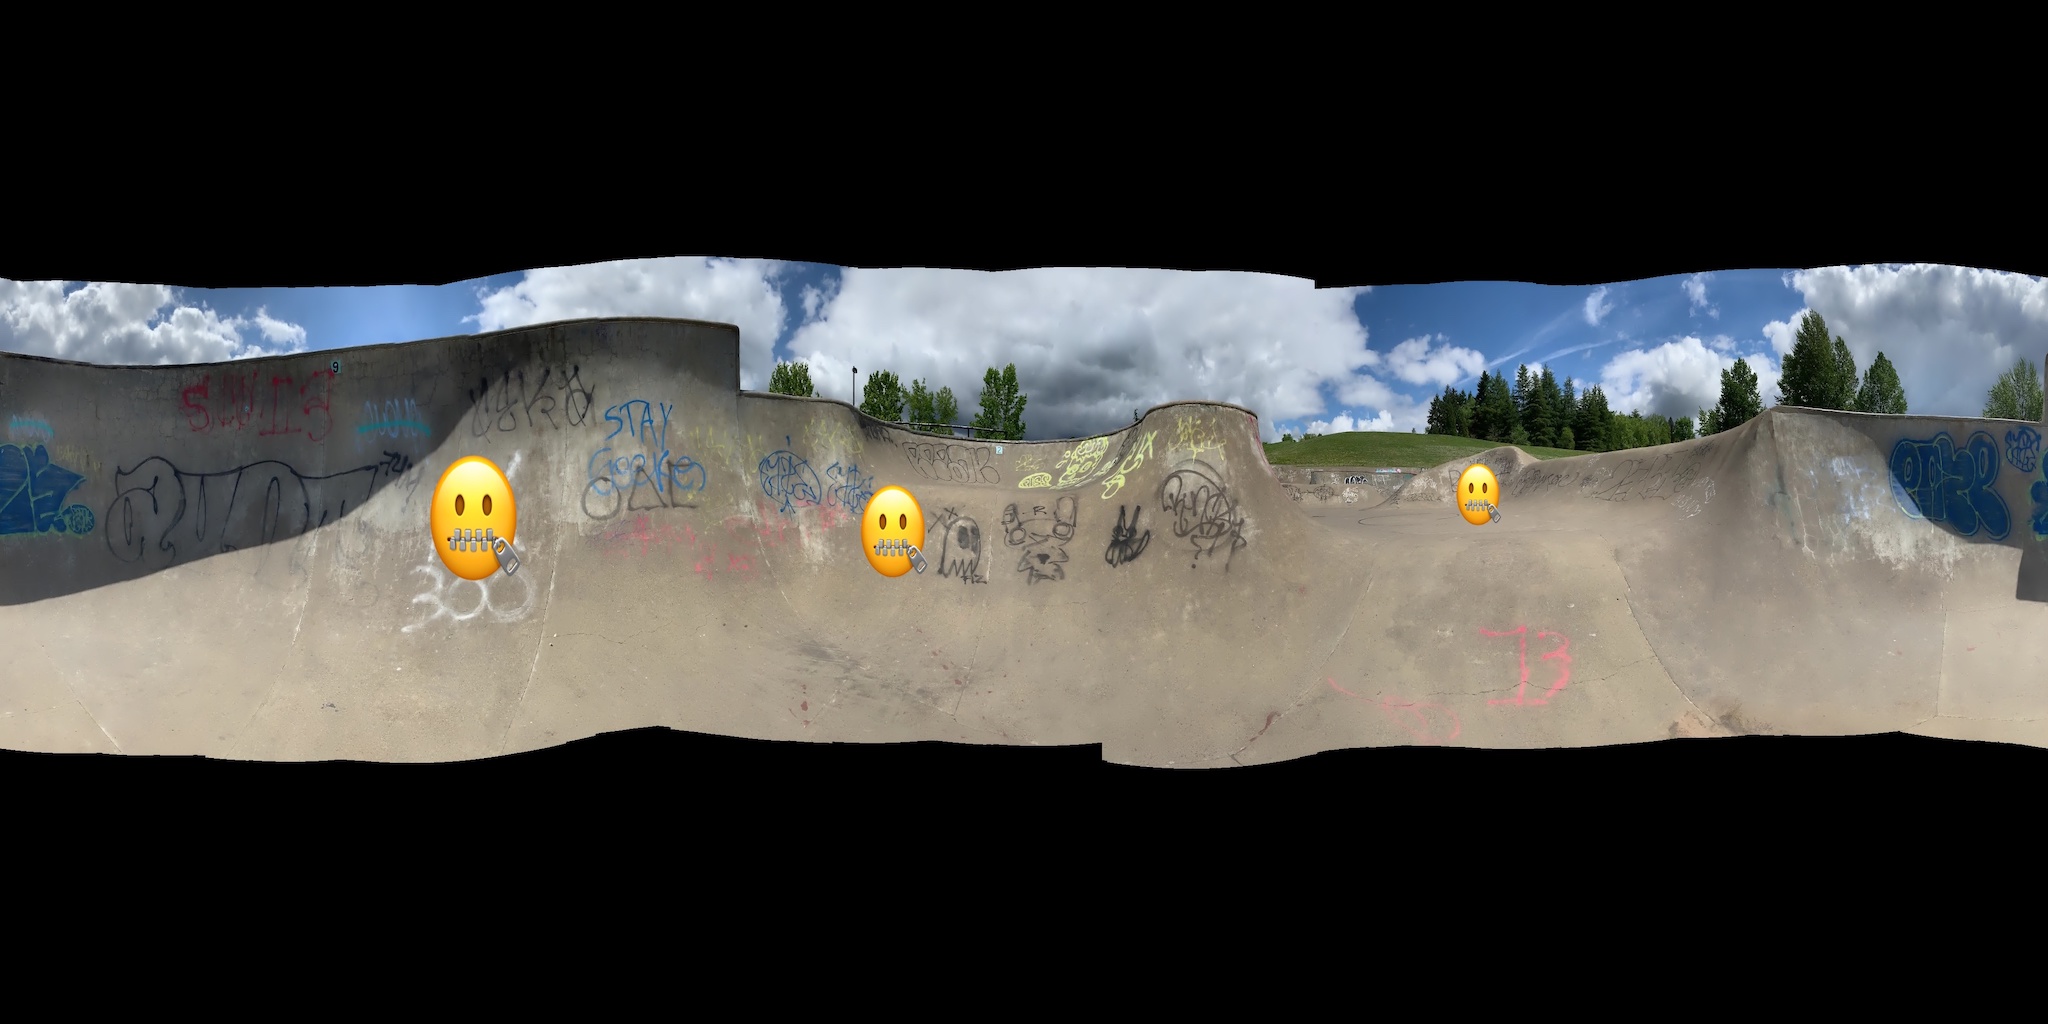
python3 add_buffer.py images/stitched.jpg 964 964 images/stitched-buffered.jpg
python3 cyl_to_equirect.py images/stitched-buffered.jpg 2048 1024 images/stitched-buffered-eqrect.jpg
ffmpeg
Extracting 3 frames per second from a 24 second video resulted in 73 photos. This is way more than necessary, but the results are consistently good with more photos until memory becomes an issue. A steady rotation is required to create enough overlap in the extracted photos. Experiment to find the minimum required for your video. Less photos results in faster processing.

stitching.py
The stitcher aligns the extracted images to create a panorama. Any repetition in the start and finish gets discarded. There will be jagged edges at top and bottom since our rotation technique is not perfect. Those could be clipped to create a smooth line.
(A stitcher is built into opencv. There’s more error handling than method calls required.)
import cv2
...

stitcher = cv2.Stitcher.create(cv2.Stitcher_PANORAMA)
status, pano = stitcher.stitch(imgs)

if status != cv2.Stitcher_OK:
    print("Can't stitch images, error code = %d" % status)
    sys.exit(-1)

cv2.imwrite(args.output, pano)

add_buffer.py
A level panorama means the area directly above and below the camera is not captured. This detail can be added to the metadata of the final image for the 360 viewer to utilize. Some viewers such as a-frame will ignore this though. For this reason, you may wish to add extra pixels to extend the image border. What amount depends on how much of the sphere was not captured. Half of the image height as a border above and below this panorama prevented obvious distortion in the viewer.
(Image borders are easily added with opencv. Just configure the width and appearance.)
import cv2
...

# Add the buffer to the image
buffered_img = cv2.copyMakeBorder(img, top_buffer, bottom_buffer, left_buffer, right_buffer, border_type, value=border_value)
cyl_to_equirectangular.py
This long panorama could wrap around a cylinder, but that’s not the format that 360 image viewers expect. They prefer what is known as equirectangular. You’ve seen this before in flat views of world maps. The center appears mostly undistorted, but the top and bottom are stretched to fill the rectangular frame. This won’t be so apparent with the borders we added. The dimensions of equirectangular images are double the height as width. This makes scaling the image size pretty simple afterwards. Just find the desired combination of image size and quality.
(Credit to AI for generating this code. Should find a library to replace it.)
import numpy as np

def cylindrical_to_equirectangular(cylindrical_image, eq_width, eq_height):
    """Converts a cylindrical panorama to equirectangular."""
    cylindrical_height, cylindrical_width, _ = cylindrical_image.shape
    equirectangular_image = np.zeros((eq_height, eq_width, 3), dtype=np.uint8)

    for y_eq in range(eq_height):
        for x_eq in range(eq_width):
            # Calculate normalized equirectangular coordinates
            lon = (x_eq / eq_width - 0.5) * 2 * np.pi
            lat = (0.5 - y_eq / eq_height) * np.pi

            # Calculate corresponding cylindrical coordinates
            x_cyl = int((lon / (2 * np.pi) + 0.5) * cylindrical_width)
            y_cyl = int((lat / np.pi + 0.5) * cylindrical_height)

            # Handle boundary conditions
            if 0 <= y_cyl < cylindrical_height and 0 <= x_cyl < cylindrical_width:
                equirectangular_image[y_eq, x_eq] = cylindrical_image[y_cyl, x_cyl]

    return equirectangular_image
360 Viewers
Viewing a 360 panorama (or video) in the browser is simple with a-frame. Just provide the equirectangular image and the rotation for the initial camera view.
<a-scene embedded>
  <a-sky src="example.jpg" rotation="0 0 0"></a-sky>
</a-scene>
(The example below is interactive! Rotate horizontally to experience the full scene.)
Adding EXIF Metadata
Had there not been an image border to prevent distortion in a-frame, the cropped dimensions of the sphere would have been necessary in the metadata. Other 360 image viewers can make use of these settings. Google Photos is useful for testing this functionality.
# See https://developers.google.com/streetview/spherical-metadata
exiftool example.jpg -projectiontype=equirectangular -usepanoramaviewer=true \
                    -XMP-GPano:ProjectionType="equirectangular" \
                    -XMP-GPano:FullPanoWidthPixels=3856 -XMP-GPano:FullPanoHeightPixels=3856 \
                    -XMP-GPano:CroppedAreaImageWidthPixels=3856 -XMP-GPano:CroppedAreaImageHeightPixels=1928 \
                    -XMP-GPano:CroppedAreaTopPixels=964 -XMP-GPano:CroppedAreaLeftPixels=0
Google Photos will still want the metadata to render properly when not padding the image. Notice that FullPanoHeightPixels, CroppedAreaImageHeightPixel, and CroppedAreaTopPixels are different below. Unsure why the CroppedArea tags can’t be omitted entirely in this scenario.
# See https://developers.google.com/streetview/spherical-metadata
exiftool examle.jpg -projectiontype=equirectangular -usepanoramaviewer=true \
                    -XMP-GPano:ProjectionType="equirectangular" \
                    -XMP-GPano:FullPanoWidthPixels=3856 -XMP-GPano:FullPanoHeightPixels=1928 \
                    -XMP-GPano:CroppedAreaImageWidthPixels=3856 -XMP-GPano:CroppedAreaImageHeightPixels=1928 \
                    -XMP-GPano:CroppedAreaTopPixels=0 -XMP-GPano:CroppedAreaLeftPixels=0
Additionally, GPS information can be captured in the metadata. The combination of coordinates and bearing is useful when combining imagery with mapping software.
exiftool example.jpg -gpslatitude=0.0 -gpslongitude=0 \
                     -gpslatituderef=N -gpslongituderef=W \
                     -gpsimgdirection=0 -gpsdestbearing=0
More articles coming soon.